Wood slat wall panels have become a popular architectural and interior design solution for residential, commercial, hospitality, and retail spaces. Their combination of natural textures, acoustic performance, and modern linear patterns makes them particularly suitable for feature walls and decorative interiors.
Adding LED lighting between or behind the slats can make these walls even more visually interesting. However, installing an LED strip directly onto a wood surface does not always produce the cleanest or most professional result.
This is where an LED channel for wood slat wall panels can make a significant difference.
The right LED channel can protect the LED strip, improve heat management, control light diffusion, and create a more integrated lighting effect between the wooden slats. But choosing the right profile requires more than simply finding a channel that fits the LED strip.
This guide explains how to select an LED channel for wood slat wall panels, including profile type, dimensions, diffuser, installation method, heat management, light distribution, and customization.
Why Use an LED Channel for Wood Slat Wall Panels?
LED strips can be attached directly to the back or side of a wood slat panel. While this may work for simple decorative projects, an aluminum LED channel provides several advantages.
A Cleaner and More Professional Appearance
A properly selected LED channel can hide the LED strip and create a consistent linear lighting effect.
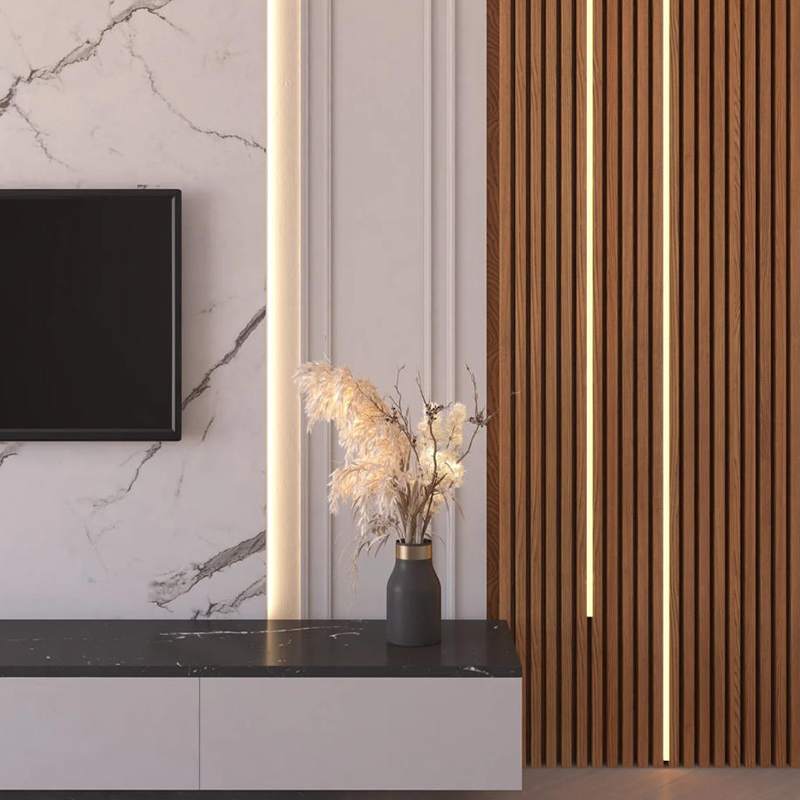
Instead of seeing the individual components of the LED strip, the viewer sees a controlled line of light integrated with the wood wall.
This is especially important for feature walls in hotels, restaurants, offices, retail stores, and high-end residential interiors.
Better Heat Management
LED strips generate heat during operation. An aluminum channel provides a metal mounting surface that can help transfer heat away from the LED strip.
This does not mean that every aluminum channel provides sufficient thermal performance. The LED strip’s power, profile size, aluminum construction, installation location, and surrounding ventilation all need to be considered.
For high-output LED strips, selecting an appropriately sized aluminum profile is particularly important.
Protection for the LED Strip
Wood slat walls can be exposed to dust, cleaning, installation work, and accidental contact. An LED channel and diffuser provide an additional layer of protection for the LED strip.
The profile can also help keep the LED strip in a fixed and straight position.
More Consistent Light
A diffuser can soften the light and reduce the visibility of individual LED points.
This is particularly useful when the LED channel is installed in a visible gap between wood slats or when the lighting is intended to create a continuous architectural effect.
What Type of LED Channel Is Best for Wood Slat Walls?
There is no single profile that works for every wood slat wall. The right design depends on how the lighting will be integrated into the wall.
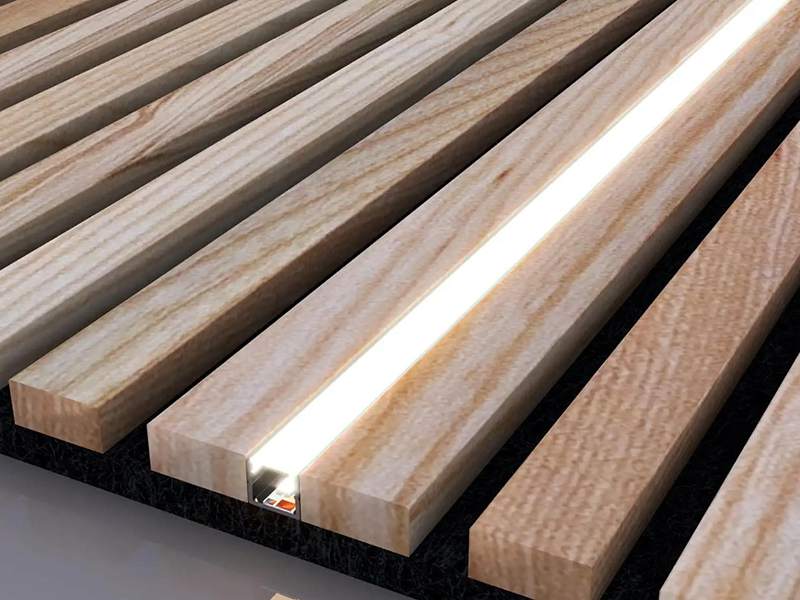
Recessed LED Channel
A recessed LED channel is often suitable when the wall structure allows the profile to be integrated into a groove or dedicated space.
The profile can sit between or behind the wooden slats, creating a more integrated appearance.
This approach works particularly well for new construction or custom wall-panel projects where the profile position can be planned before installation.
A recessed profile can also reduce the amount of visible aluminum, allowing the light itself to become the main visual element.
Surface-Mounted LED Channel
A surface-mounted profile can be easier to install when the wood slat wall has already been constructed or when creating a recessed groove is impractical.
The profile can be attached directly to the supporting surface or another structural component behind the slats.
Surface-mounted channels are often useful for retrofit projects because they generally require less modification to the existing wall.
Slim LED Channel
If the spaces between the wood slats are narrow, a slim profile may be required.
Before selecting a slim channel, measure the actual available width rather than assuming that a profile will fit based on its external dimensions.
The profile also needs enough internal space for the LED strip, wiring, and any required connectors.
Custom LED Channel
Some wood slat wall systems have unique slat widths, spacing, depths, or mounting structures.
In these situations, a standard LED channel may not provide the desired fit or lighting effect.
A custom aluminum profile can be designed around the exact dimensions of the wall system.
For large architectural projects, this can be particularly useful because the LED channel can be developed together with the wood panel structure.
How to Measure the Space Between Wood Slats
One of the most important steps when choosing an LED channel is measuring the available installation space.
Do not measure only the visible gap from the front of the wall.
You should also determine:
- Gap width between slats
- Available profile depth
- Distance between the profile and front surface
- Thickness of the wood slats
- Supporting structure behind the slats
- Available space for wiring
- LED strip width
- LED strip height
For example, a profile may physically fit between two slats but still protrude too far forward. This can create an unwanted visible edge.
Similarly, a profile may fit inside the available width but leave insufficient space for the LED strip connector or wiring.
A simple cross-sectional drawing can be extremely helpful before ordering a large quantity of profiles.
How to Choose the Right LED Strip for the Channel
The LED channel and LED strip should be considered as one lighting system.
LED Strip Width
Check the actual width of the LED strip before ordering the profile.
Common LED strip widths vary, and some high-density or specialized strips can be wider than standard models.
The internal width of the channel should provide enough space for the strip without making installation unnecessarily difficult.
LED Density
LED density affects how continuous the light appears.
A low-density strip can produce visible bright spots when viewed through a diffuser, particularly when the LED strip is installed close to the cover.
Higher-density or COB LED strips can be useful when the goal is to create a more continuous line of light.
However, LED density should be evaluated together with profile depth and diffuser design.
Color Temperature
Wood slat walls are commonly used in warm and natural interior environments.
Depending on the design, warm white light may complement natural wood tones, while neutral white can provide a cleaner architectural appearance.
The appropriate color temperature depends on the overall interior design rather than the wood itself.
For commercial projects, it is also worth confirming the color consistency and color rendering requirements of the LED strip.
Choose the Right LED Channel Depth
Profile depth is one of the most overlooked factors when designing LED lighting for wood slat walls.
A shallow profile takes up less space and can be useful when the available cavity is limited.
However, a deeper profile creates more distance between the LED strip and diffuser. This additional distance can improve optical mixing and help reduce visible LED hotspots.
If the lighting will be viewed directly from the front, profile depth becomes particularly important.
For indirect lighting, where the LED strip points toward the wall or another surface, the depth requirements may be different.
The key is to select the profile based on the intended viewing angle and lighting effect rather than choosing the smallest available channel.
Select the Right Diffuser
The diffuser is another important component of an LED channel for wood slat walls.
Clear Diffuser
A clear diffuser allows a high proportion of the LED light to pass through.
It can be suitable when maximum brightness is important, but individual LED points may remain visible.
Frosted Diffuser
A frosted diffuser spreads the light and helps soften the appearance of the LED strip.
It is a common choice for decorative wall lighting where the goal is to avoid a harsh or overly visible light source.
Opal or Milky Diffuser
An opal diffuser provides stronger diffusion and can be useful when a smoother light line is required.
However, stronger diffusion can also reduce light transmission, so the final effect should be tested with the selected LED strip.
Should the LED Channel Be Black, Silver, or White?
The surface finish can affect both the appearance of the installation and how well the profile integrates with the wood wall.
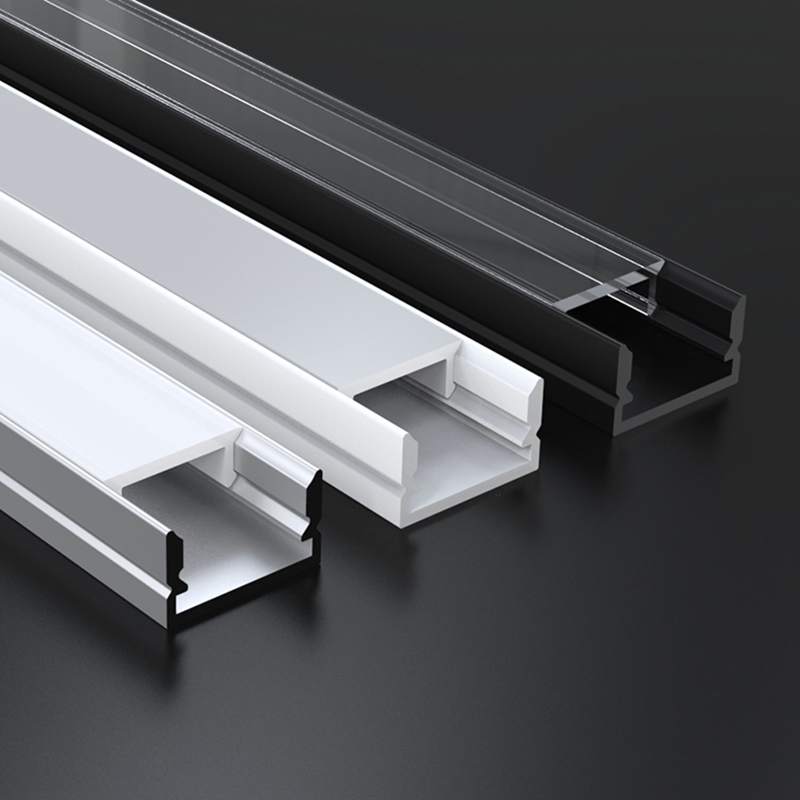
Black LED Channel
Black profiles can visually blend with darker wood slats or disappear into shadow gaps.
They are particularly suitable for modern interiors where the profile should remain visually subtle.
Silver or Natural Aluminum
Natural or anodized aluminum is a common option for general-purpose applications.
It provides a clean technical appearance and is widely available in different profile designs.
White LED Channel
White profiles can work well with light-colored wood, painted surfaces, or interiors where the lighting system needs to match a light background.
For architectural projects, custom powder-coated colors may also be considered.
Consider the Direction of the Light
The position of the LED strip inside the profile determines where the light goes.
For a wood slat wall, lighting can be designed in several ways.
Front-facing lighting directs light toward the room and can create visible illuminated lines between the slats.
Backlighting directs light toward the wall behind the slats, producing a softer glow around the wood.
Side lighting can emphasize the texture and depth of the slats.
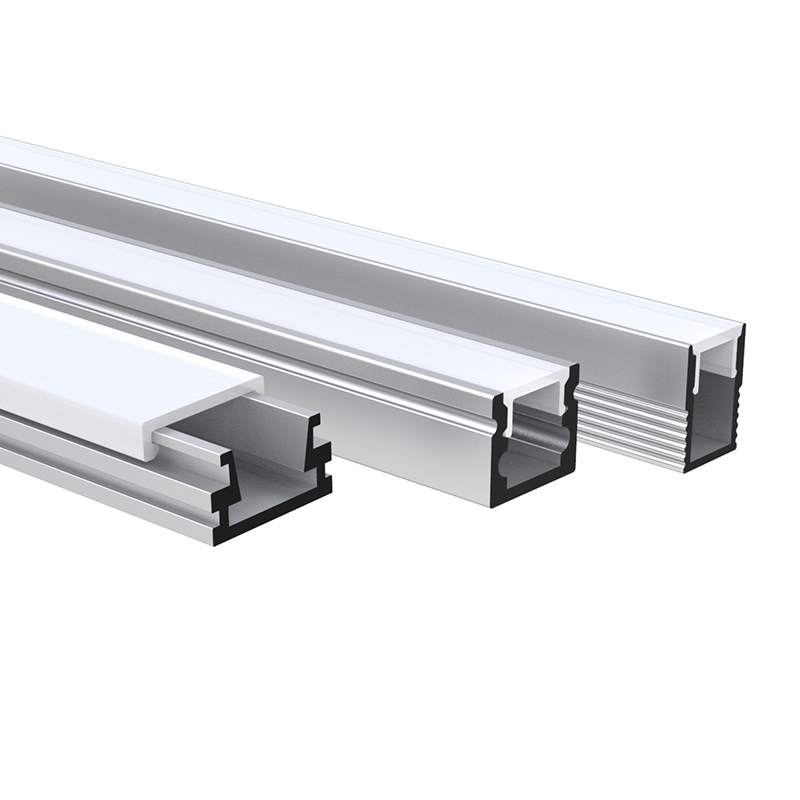
The best profile geometry depends on the desired effect. A standard U-shaped channel may work well for direct lighting, while an angled or custom profile can be more suitable when the light needs to be directed toward a particular surface.
How to Install an LED Channel on a Wood Slat Wall
The installation method depends on the construction of the wall.
Step 1: Plan the Lighting Layout
Determine where the LED channels will be installed and whether the lighting should be continuous or divided into separate sections.
Step 2: Measure the Available Space
Measure the slat spacing, profile cavity, profile depth, and cable routing area.
Step 3: Select and Test the Profile
Install a sample section before ordering large quantities.
Check whether the profile fits correctly and whether the diffuser produces the desired visual effect.
Step 4: Install the Aluminum Profile
Depending on the profile design, it can be fixed using mounting clips, screws, adhesive, or another mounting method.
For recessed installations, the profile should be positioned accurately before the surrounding panel structure is finalized.
Step 5: Install the LED Strip
Clean the mounting surface and install the LED strip according to the manufacturer’s instructions.
Make sure the strip is positioned consistently along the entire channel.
Step 6: Connect and Test the Lighting
Test the LED strip before closing the diffuser.
Check brightness, color consistency, connections, and the appearance of the light from the normal viewing position.
Step 7: Install the Diffuser and End Caps
Once the lighting has been tested, install the diffuser and end caps.
For long continuous runs, allow for appropriate expansion, connection, and maintenance considerations according to the profile and installation design.
Common Mistakes to Avoid
Choosing the Channel Before Measuring the Wall
The available gap between wood slats should determine the profile dimensions, not the other way around.
Using a Low-Density LED Strip with a Very Shallow Profile
If the LED strip is too close to the diffuser, individual LED points may remain visible.
Ignoring Cable Routing
A profile can fit perfectly while the wiring has nowhere to go.
Cable entry and exit points should therefore be planned before installation.
Selecting the Cheapest Profile for a Large Project
For architectural projects, small differences in profile dimensions, straightness, surface finish, and diffuser quality can become obvious when the same product is installed across a large wall.
Assuming Every Aluminum Profile Is Suitable for High-Power LEDs
Thermal performance depends on the complete system. Always match the profile to the LED strip power and installation environment.
What Should B2B Buyers Ask an LED Channel Manufacturer?
For distributors, architects, contractors, furniture manufacturers, and lighting brands, several additional questions are worth asking before placing a bulk order.
Confirm:
- Profile width, height, and internal dimensions
- Compatible LED strip width
- Aluminum alloy and wall thickness
- Standard and customized lengths
- Diffuser material and light transmission
- Surface finishes and colors
- Mounting accessories
- Cutting and machining tolerances
- Custom extrusion capabilities
- Tooling costs and MOQ
- Sample availability
- Packaging and labeling
- OEM/ODM services
For large wood slat wall projects, it is particularly useful to request a complete sample containing the aluminum profile, diffuser, LED strip, and mounting method.
This allows the lighting effect and physical fit to be evaluated before mass production.
Can LED Channels for Wood Slat Walls Be Customized?
Yes. Customization can be especially valuable for wood slat wall applications because panel dimensions and spacing vary considerably between projects.
A manufacturer can potentially customize:
- Profile width and height
- Internal LED strip cavity
- Profile depth
- Light-emitting angle
- Surface finish
- Diffuser
- Mounting structure
- Length
- End caps
- Packaging and branding
For OEM and architectural projects, custom aluminum extrusion can allow the LED channel to become part of the wall system rather than an additional component attached after the wall has been designed.
Final Thoughts
Choosing the right LED channel for wood slat wall panels requires balancing the physical structure of the wall with the requirements of the lighting system.
Start by measuring the available space between and behind the wood slats. Then consider the LED strip width, power, density, profile depth, diffuser, mounting method, light direction, and surface finish.
For simple projects, a slim surface-mounted or recessed LED channel may be enough. More demanding architectural installations may benefit from deeper profiles, specialized optical designs, or custom aluminum extrusion.
For B2B projects, working with an LED profile manufacturer that can provide extrusion, machining, surface finishing, diffuser customization, cutting, assembly, and OEM/ODM support can also simplify procurement and help maintain consistency across large installations.
The goal is not simply to find an LED channel that fits between the wood slats. The right solution should fit the wall structure, support the LED strip, produce the intended lighting effect, and remain practical to manufacture and install at project scale.